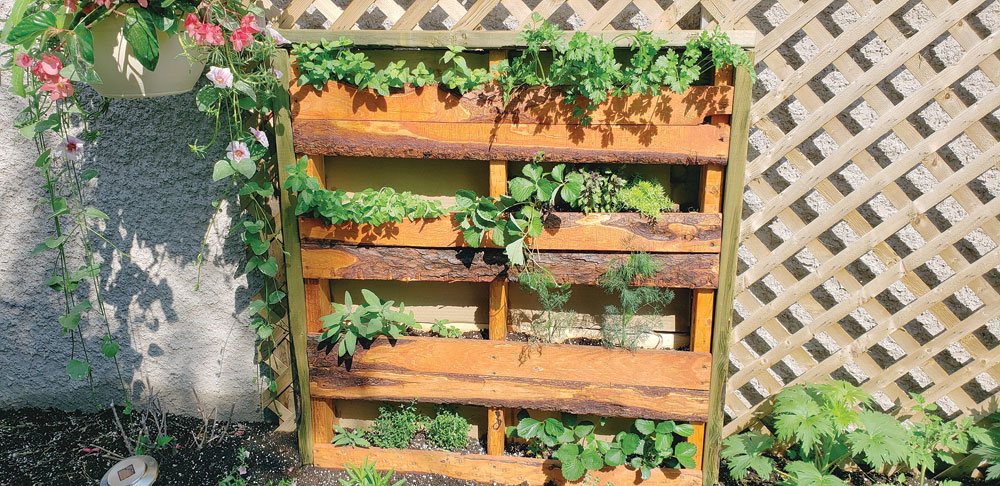

Ye Two Olde Dawgs build a herb wall out of pallet boards
Vertical gardening has become such a trend especially to those who have limited space but love to garden. See how these two old dogs build a herb wall out of recycled pallet boards.
By Ian Leatt
“It’s like this,” I say. “People are very concerned about the environment, especially our readers of the Manitoba Gardener. We have an opportunity to film some easy honey-do projects and help our readers, while being practical and environmentally conscious! Do you not think that is a good idea?”
Gord looks at me with a cheeky grin on his face, a hint of mischief in his eyes. “I know you like a challenge!” he says
“Why not?” I ask innocently. “I think this could be a lot of fun. What do you think our first project should be?” I ask.
“How about a wall? We could build a herb wall and a strawberry wall,” says Gord. “I have an idea just how cool it could be.”
He adds, “Why don’t we build it in your yard? I am sure you can find space for something like that!’
Gord knows I’m big on gardening. As he goes on to explain his idea, I get excited, a willing right hand so to speak.
Gord makes some calls to industry friends and one evening when I arrive home I find 20 used pallets on my driveway. This could be a disaster waiting to happen, I think. I really hope he knows what he’s doing!
Saturday soon comes around and Gord arrives. “Ok, we need blah, blah, blah. . .“ That’s all I hear as I watch him wandering in and out of the garage with this tool and that tool, screws, hammers, drills, saws until finally he says, “You ready?”
Here is what you will need to convert pallets to planters:
3 pallet boards (makes 2 wall planters)
Hammers
3 x 2×6 treated wood 8 ft in length.
Heavy duty cardboard. (16 pieces each being greater than 2 ft by 1 ft, also recyclable)
Screws, (1 ½ inch plus 3 inch)
Wood stain
Directions:
The easy part about doing this is a that it really doesn’t take that much time at all. The first thing you need to do is carefully review your pallets, deciding on what height you want each shelf to be. Having made that decision remove every second slat and replace it to be directly above the slat below, creating depth.
The underside of each shelf needs to be fixed. Remove several slats from another pallet board and measure them to the desired size. Screw in each piece, starting with the top shelf, while working your way down. The lowest shelf does not require a bottom piece as this will be directly above the soil.
Once each bottom has been fixed, turn what is now the shelf pallet over and fix a piece of cardboard or board if you have it to the open spaces created. This gives the back of the shelf some stability, enabling the soil to stay in place.
The vertical wall garden is now complete. Place it in its desired location and screw into the wall for stability. You don’t want it falling over. Stain it your choice of colour.
Finally, cut the 2” x 6” treated wood to the length of each side and screw it in place. We left the top piece loose allowing for growth inside. c