How to Install Garden Lighting
Garden lighting can be a practical way to beautify our garden. It can help safeguard our property, illuminate a walkway to protect against mishap, or simply extend the hours in which to enjoy the solace of our gardens. Lighting can be attractive. It makes a dramatic statement if used appropriately. It can add nuance and dimension, and drawing our eye towards natural focal points.
Unfortunately, many people are put off by the work and level of technical expertise it involves. Safety codes requires all outdoor lighting to be serviced by underground feeder (UF) cables. these cables must be buried to a significant depth below the ground. Gone are the days when you ran an extension cord to your light feature and covered it with a handful of mulch. It just seems a daunting task.
In truth, it really shouldn’t. Connecting the wiring may require some technical know-how (and if you’re unsure of yourself, call in an electrician or consult a good do-it-yourself electrical manual), but running the UF cable to your new light feature needn’t be backbreaking or difficult.
Planning the wire route

Next, choose the easiest path between these two points, remembering that you’ll have to dig a 12-inch (30-centimetre) trench between them in which to lay the new cable. Give trees a wide birth to avoid chopping through roots, a time consuming task that just might kill the tree. If you must pass under a walkway, make sure to do so at a right angle for ease of tunneling and a 3- foot long straight section of trench on either side so that you can easily drive the cable through.
Mark the route with paint.
Before you dig, call the utility companies to mark any underground lines and get an electrical permit as required.
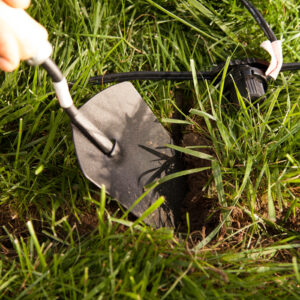
Digging the trench

The trench should be at least 12 inches (30 centimetres) deep. If your soil is too rocky or dense with clay to make a trench of that depth practical, an alternative is to dig it six inches (15 centimetres) deep and protect the wire by running it in rigid metal conduit.
Pile the dirt in a wheelbarrow or on a sheet of plastic next to the trench. This makes your clean up much easier and prevents soil and rocks from messing up lawns or walkways.
When approaching a walkway or other obstacle, make sure to dig the trench a few inches deeper. You’ll need the clearance to drive rigid metal conduit under the walkway with a sledgehammer.
After finishing the trench, dig a posthole at the far end to receive the light pole post. The posthole should be about 24 inches (60 centimetres) deeper than the trench itself.
Running wire under walkways and patios
Getting wire under obstructions such as walkways is easier than one would initially expect. Begin by driving half-inch (12.7-millimetre) rigid metal conduit under the walk-way with a sledgehammer. Never use plastic conduit, which is too weak for the task, or thinner metal conduit, which corrodes quickly. The conduit should be at least a foot longer than the walkway’s width. Protect the ends from damage by screwing couplings onto the ends and then screw plugs into the couplings. One of the plugs serves as a tunneling point and the other protects the pipe from damage inflicted by your hammering.
Before driving the conduit, prop it on wooden blocks to keep it clear of the trench bottom. Make sure it’s level. Aim it directly towards the middle of the trench on the opposite side so that it will emerge at the right spot.
If you have to drive conduit through longer sections, such as required for passing under patios or driveways, drive a section of the conduit up to the end of the trench. Remove the plug and screw on another section and start driving again.
Once the conduit is driven under the obstruction, simply push the cable through.


